

Want to make a beautiful handmade Christmas ornament without complicated crochet stitches or stuffing? ❤️ This red and cream cord Christmas tree is a lovely DIY project for decorating your Christmas tree, gift wrapping, or making handmade holiday gifts.
The pearl beads and soft cord loops give it a beautiful, elegant look. Follow these 6 simple steps to make your own!
Materials You’ll Need
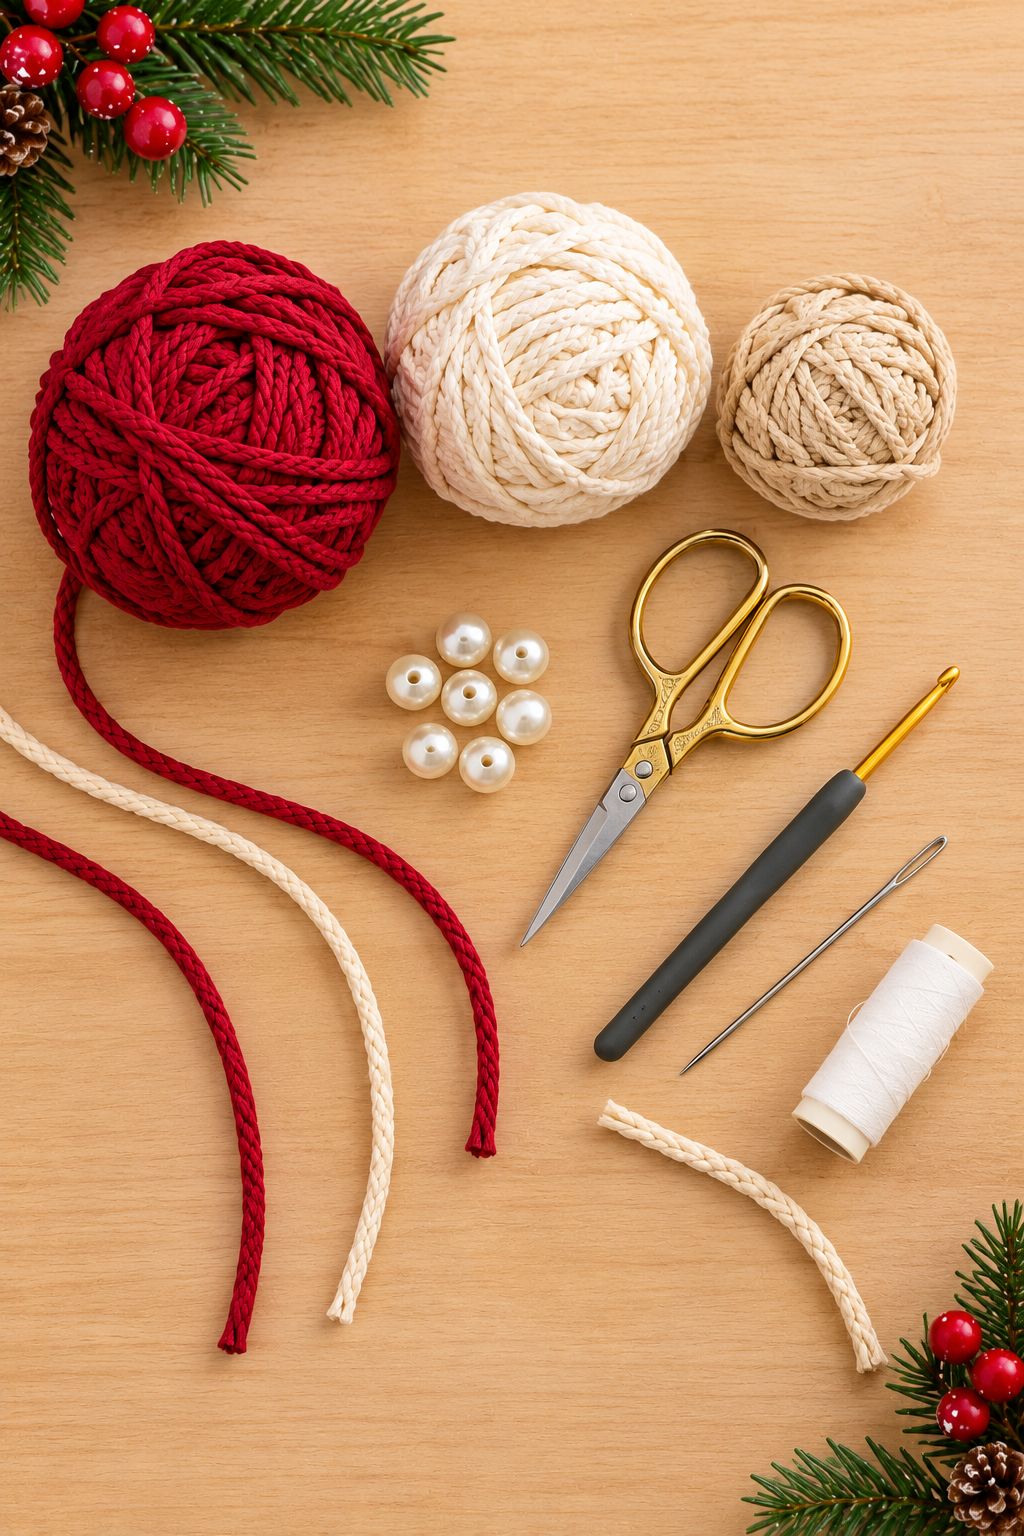
- Red braided cotton cord
- Cream or ivory braided cotton cord
- 6 pearl beads with holes
- Scissors
- Measuring tape
- Needle and strong matching thread, or clear craft thread
- Small amount of fabric glue, if needed
Step 1: Prepare Your Cords

Cut a long piece of red cord and a shorter piece of cream cord. Start by folding the red cord to make a hanging loop at the top. Secure the loop with a tight wrap or a few stitches.
Easy pattern: Fold the red cord in half, leave a loop at the top, and secure the two ends together.
Step 2: Make the Top Knot
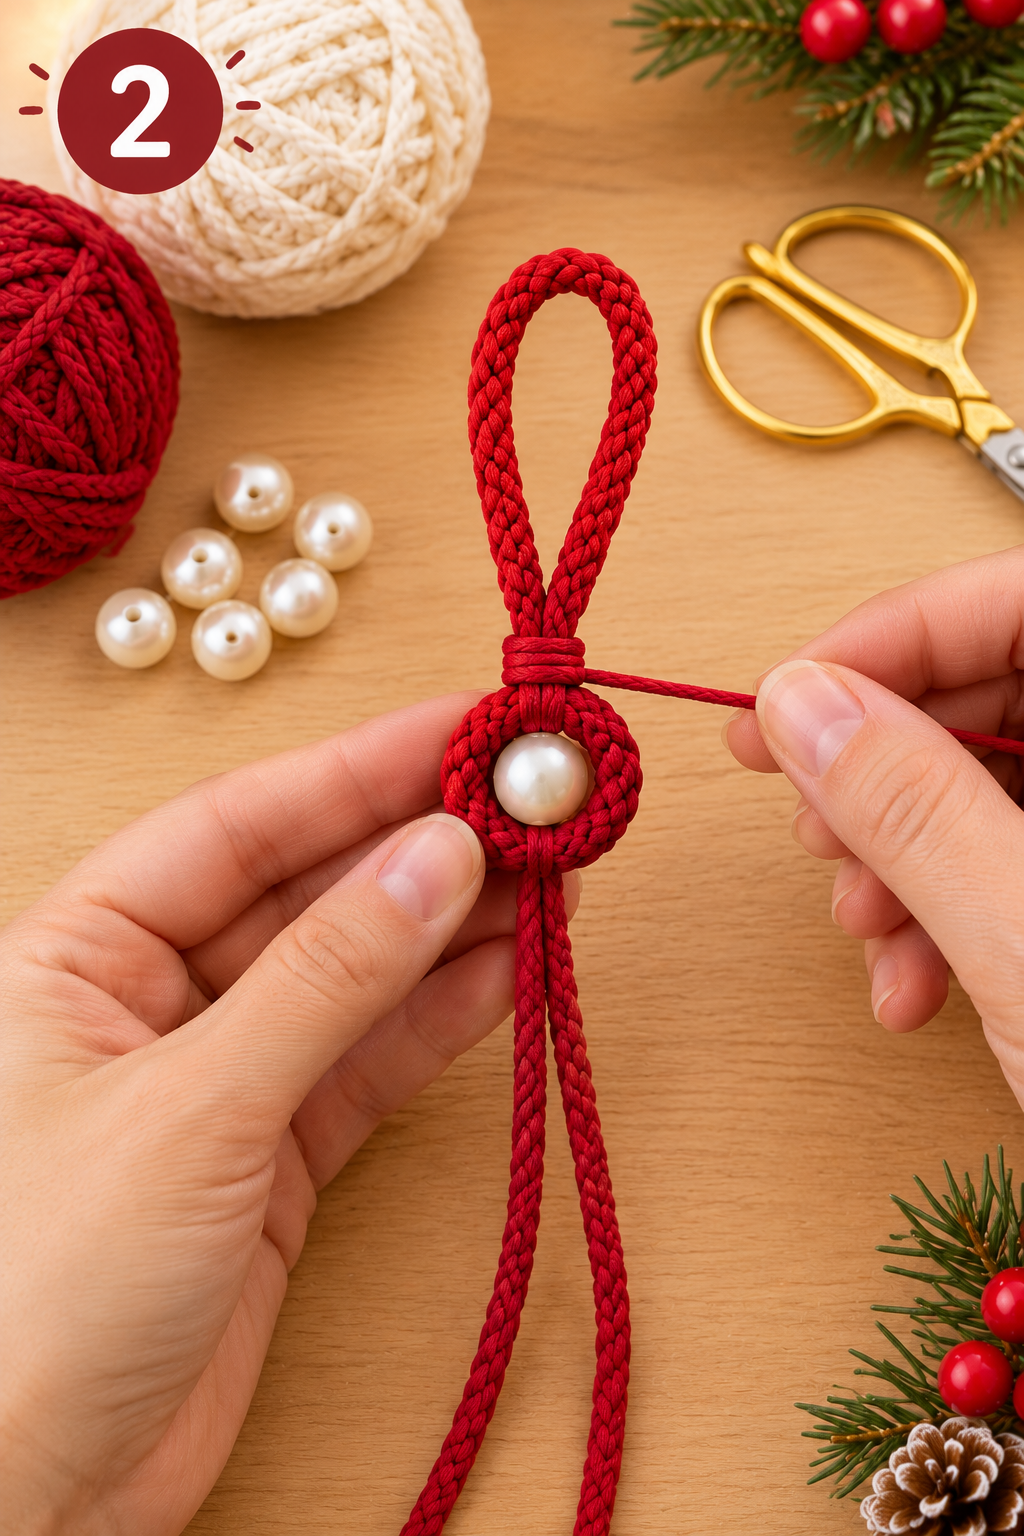
Shape the red cord into a small round loop beneath the hanging loop. Add one pearl bead in the center and secure the cord so the bead stays in place.
Easy pattern: Form a small circle with the red cord, pass the ends behind it, and stitch the crossing point securely.
Step 3: Add the Cream Bow
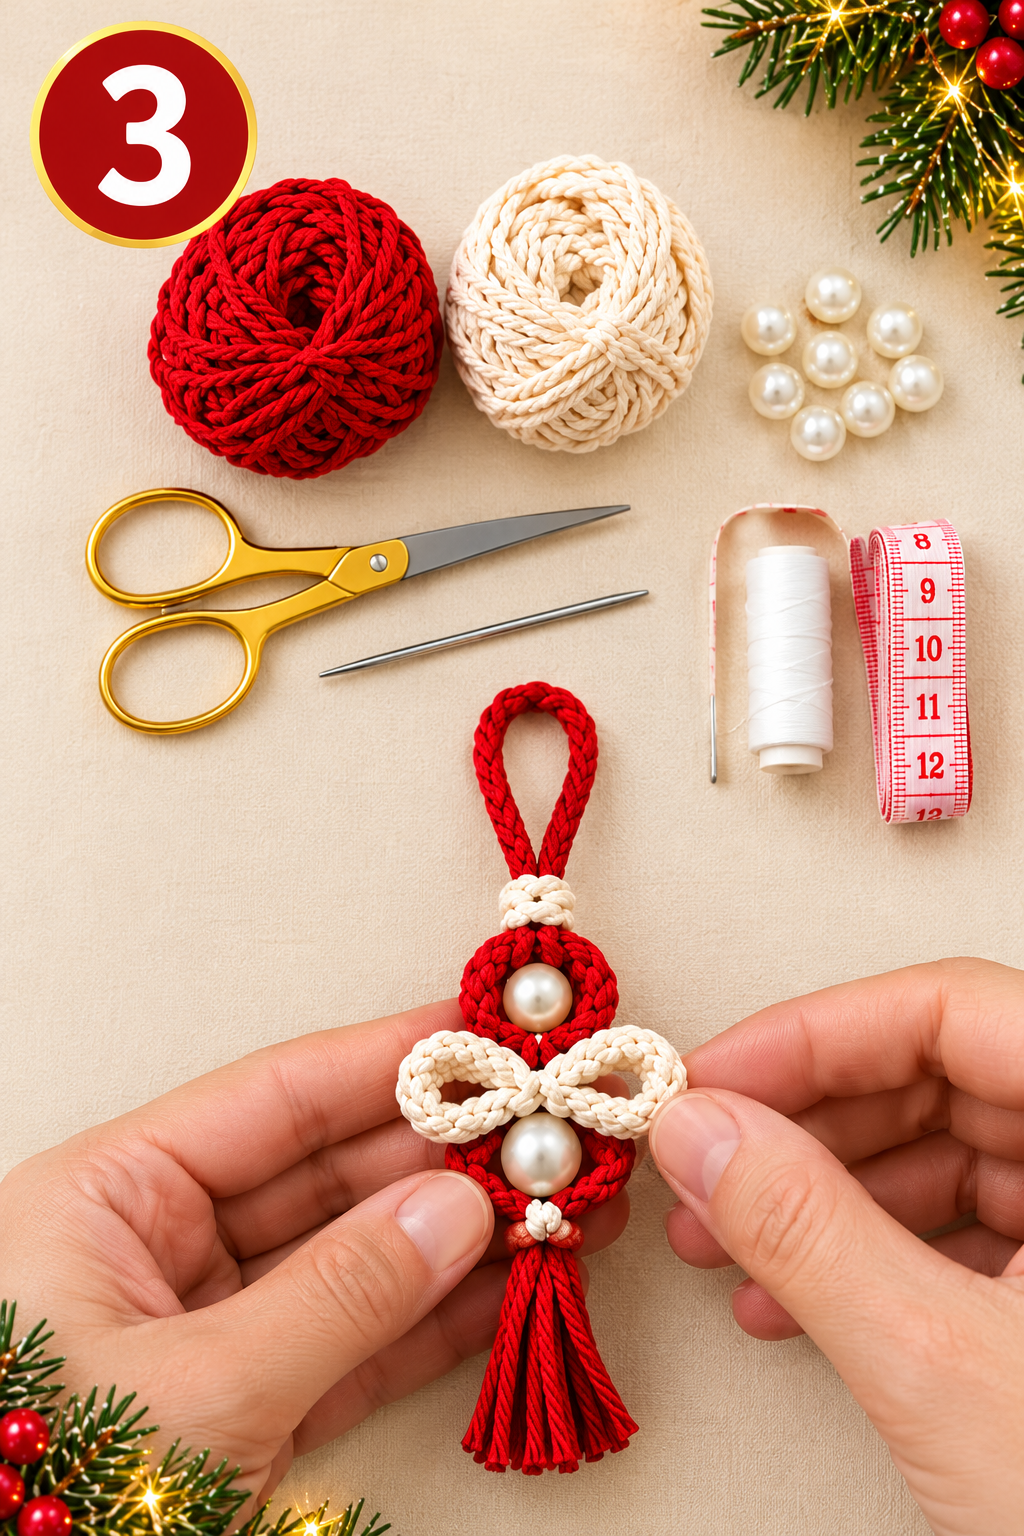
Use the cream cord to create two small loops, one on each side, like a little bow. Place a pearl bead underneath the bow and secure the center with thread.
Easy pattern: Make two equal loops, cross them in the middle, and stitch the crossing point.
Step 4: Make the Red Tree Branch
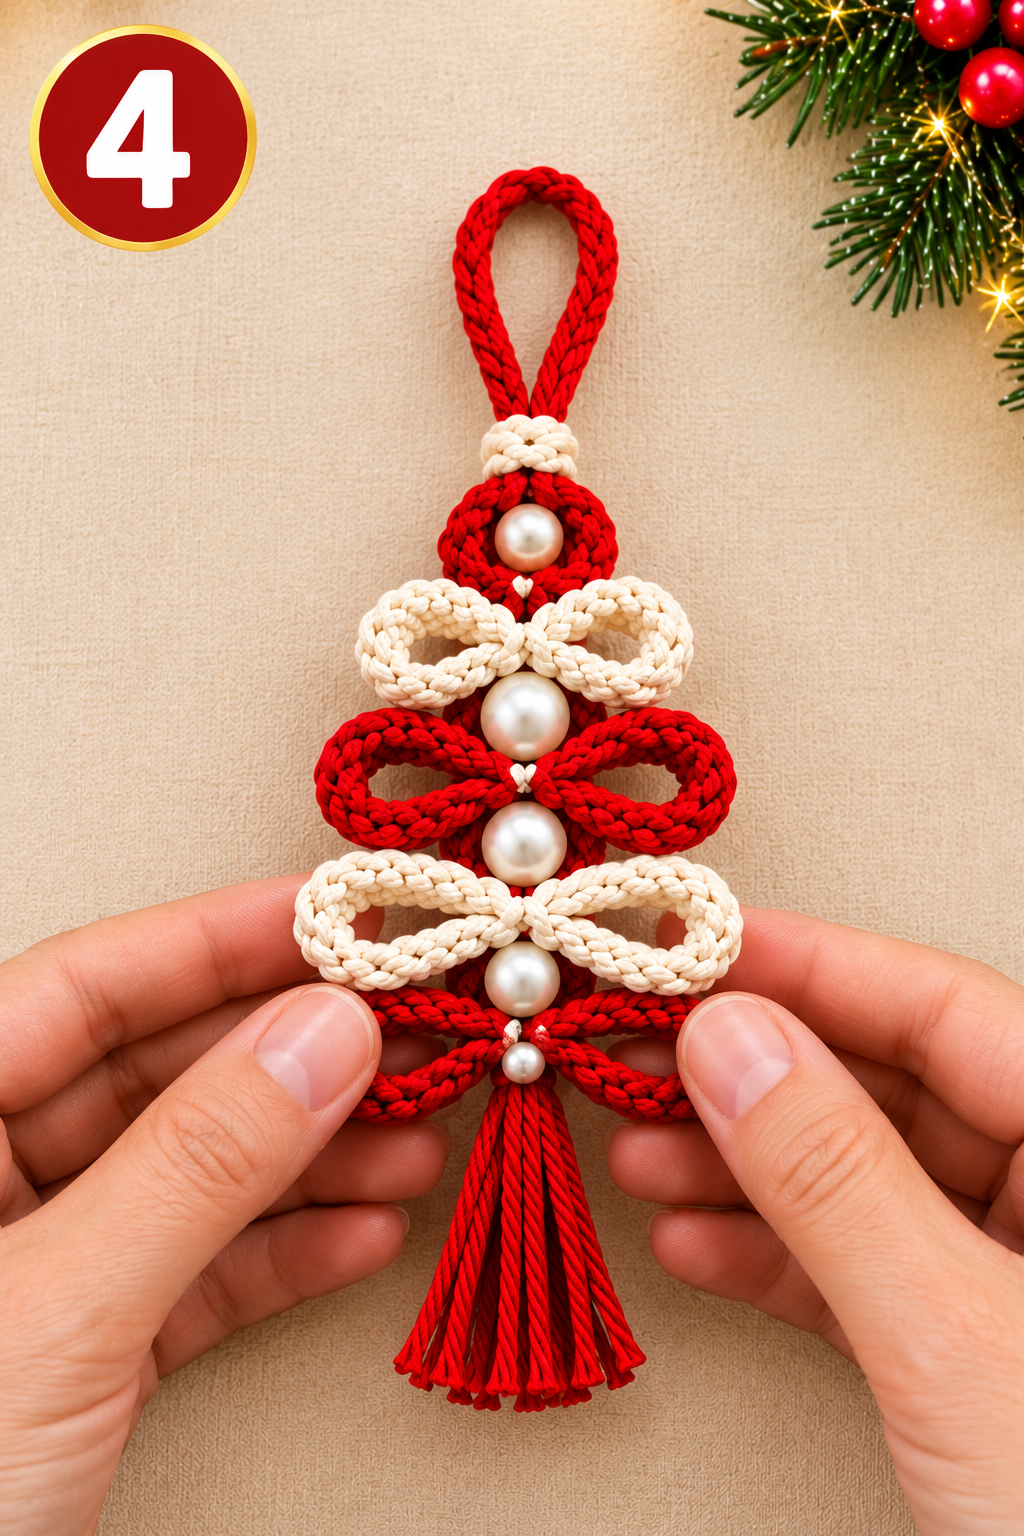
Take the red cord and form two horizontal loops, one on the left and one on the right. Cross the cord at the center to create a decorative figure-eight shape. Add a pearl bead below the loops.
Easy pattern: Make two matching loops, cross the cord ends at the center, and secure with a few stitches.
Step 5: Add the Cream Branch
Repeat the same figure-eight technique using the cream cord. Make the loops slightly wider than the previous cream bow to create the shape of a Christmas tree. Add another pearl bead beneath the loops.
Easy pattern: Form two wide loops, cross them in the center, and sew them firmly in place.
Step 6: Finish the Tree

Create the largest pair of red loops at the bottom. Add the final pearl bead in the center, then leave several red cord strands hanging down. Trim the ends evenly to create a neat tassel.
Check all the loops and beads, secure any loose parts, and your handmade Christmas tree ornament is ready!
Helpful Tips
- Keep both sides of each loop approximately the same size.
- Secure every crossing point with strong thread so the ornament holds its shape.
- If your beads do not have holes, attach them with a suitable craft adhesive.
- Let any glue dry completely before hanging the ornament.
Enjoy your handmade Christmas decoration! Save this tutorial for your holiday crafting and try it in different colors, such as green and gold, white and silver, or classic red and white. ❤️🎄