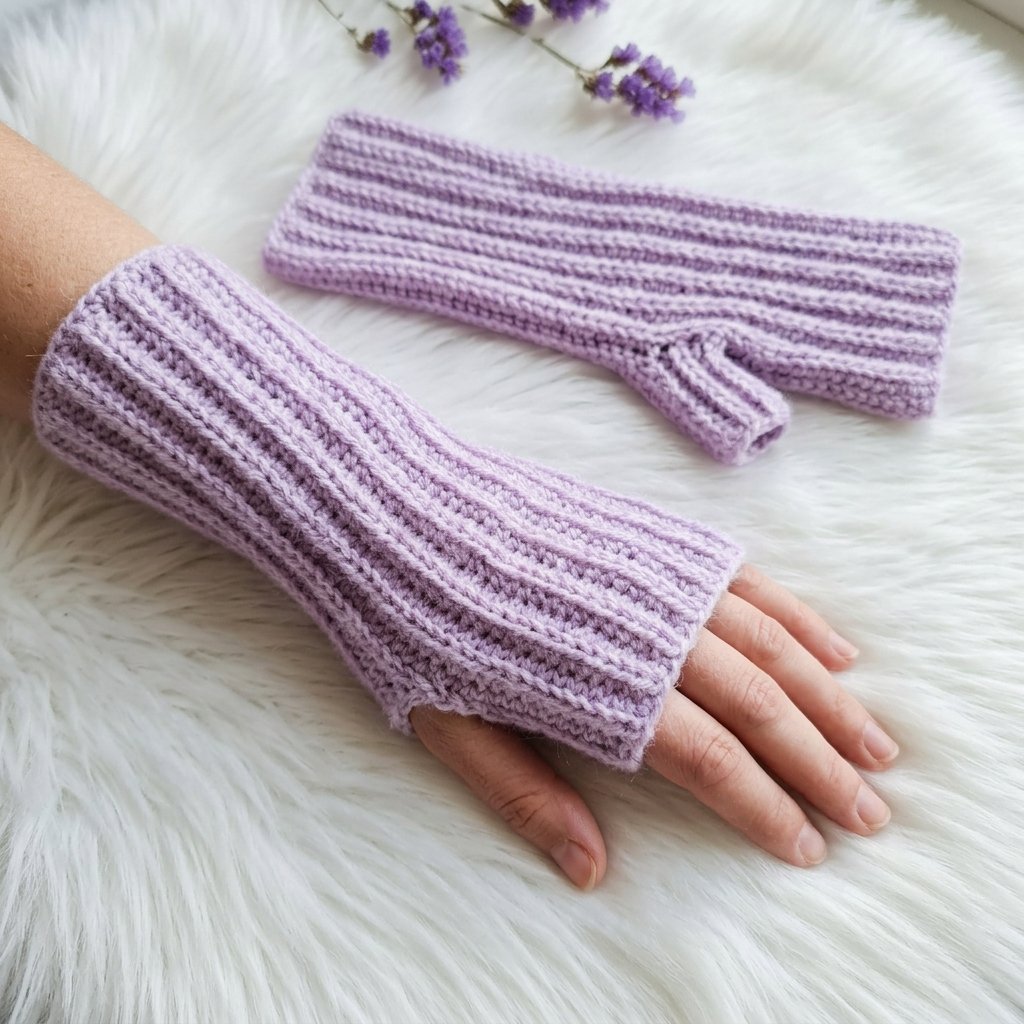
Looking for an easy crochet gloves fingerless pattern? You are in the right place! This beginner-friendly tutorial will help you make beautiful lavender crochet gloves with a soft, ribbed texture.
First, you will learn which materials to use. Next, you will crochet two simple panels. Finally, you will sew the panels together and create a comfortable thumb opening.
These fingerless gloves are stylish and practical. You can wear them yourself or make them as handmade gifts. So, gather your crochet supplies and follow the easy steps below.
[ADD IMAGE 1: Finished lavender fingerless crochet gloves]
Image alt text: Crochet gloves fingerless pattern featuring lavender ribbed gloves with open fingers.
1. Materials Needed

Before you begin, gather all your supplies. This will make the project easier and help you work without interruptions.
You will need:
- Yarn: 80–100 g of medium-weight yarn for one adult pair.
- Colour: Light lavender or dusty lilac.
- Crochet hook: 4.5 mm to start.
- Tapestry needle: For sewing the seams.
- Scissors: For cutting the yarn.
- Measuring tape: For checking the size.
- Stitch markers: Optional, for marking the thumb opening.
Choose a soft yarn that feels comfortable against your skin. Acrylic yarn or a suitable wool blend can work well.
Tip: Check the yarn label before you start. You may need a different hook size to achieve the right tension.

2. Crochet Abbreviations
This pattern uses a few basic crochet terms. Learn these abbreviations before starting.
| Abbreviation | Meaning |
|---|---|
| ch | Chain |
| hdc | Half double crochet |
| BLO | Back loop only |
| sl st | Slip stitch |
| st | Stitch |
| sts | Stitches |
| FO | Fasten off |
The main stitch is half double crochet in the back loop only. This technique creates raised ridges in the fabric.
For more crochet learning resources, visit DMC.
3. Check the Finished Measurements
The following measurements are starting estimates for an average adult pair.
| Part | Approximate size |
|---|---|
| Wrist-to-finger length | 17–19 cm |
| Flat panel width | 18–20 cm |
| Thumb opening | 4–5 cm |
| Foundation chain | 31 chains |
| First-row stitch count | 30 stitches |
| Total rows | About 28–32 |
The foundation chain determines the glove’s length. The number of rows determines the panel width.
However, yarn thickness and personal tension can change the final size. Therefore, measure your work as you go.

4. Step One: Make the Foundation Chain
Start with the first rectangular panel.
- Make a slip knot.
- Place it on your crochet hook.
- Chain 31 stitches.
- Yarn over and insert the hook into the second chain from the hook.
- Yarn over and pull up a loop.
- Yarn over again and pull through all three loops.
You have now made one half double crochet stitch.
Continue working one half double crochet into each remaining chain. You should have 30 stitches.
Next, measure the foundation row. Aim for approximately 17–19 cm. If needed, add or remove chains to adjust the length.
Beginner tip: Keep your chain relaxed. Tight chains can make the glove too short.

5. Step Two: Create the Ribbed Texture
Now it is time to make the ribbed fabric.
Row 2
- Chain 1.
- Turn your work.
- Yarn over and insert the hook into the back loop only of the first stitch.
- Complete one half double crochet.
- Repeat across the row.
Keep the stitch count at 30.
Following Rows
Repeat these steps for each new row:
- Chain 1.
- Turn your work.
- Make one half double crochet in the back loop only of every stitch.
- Continue to the end of the row.
Keep going until you have about 28–32 rows in total. Measure the panel regularly to check its width.
The raised ridges will create the classic ribbed look. For the best result, work into the back loop only on every ribbing row.

6. Step Three: Check the Panel Size
Lay your panel flat on a table. Then, check the measurements.
- Length: approximately 17–19 cm.
- Flat width: approximately 18–20 cm.
- Edges: reasonably straight.
- Ribbing: consistent and clearly visible.
- Fabric: flexible and comfortable.
Is the panel too narrow? Add a few more rows.
Is it too wide? Remove some rows before finishing.
If the panel is too short, adjust the foundation chain and make it again. This extra check can save time during assembly.

7. Step Four: Make the Second Panel
Now make the second panel using the same instructions.
Use the same yarn, hook size, and stitch technique. Also, keep the row count as close as possible.
Once both panels are complete, place them side by side. Check that they have similar measurements.
Finally, fasten off the yarn. Leave a long yarn tail if you plan to use it for sewing.

8. Step Five: Fold the Panel
Next, turn the flat panel into a glove.
- Lay the panel flat.
- Keep the ribbed texture facing you.
- Find the first-row edge.
- Find the final-row edge.
- Bring these two edges together to form a tube.
- Align the edges carefully.
Keep the wrist and finger ends open. The ribs should run from the wrist towards the fingers.
Important: Do not sew the wrist or finger openings closed. You only need to join the two long edges of the folded panel.

9. Step Six: Sew the Seam and Create the Thumb Opening
Use a tapestry needle and matching lavender yarn.
Follow these steps:
- Start sewing at the wrist end.
- Sew approximately 5–6 cm along the aligned edges.
- Leave a gap of about 4–5 cm for the thumb.
- Continue sewing towards the finger end.
- Secure the yarn neatly.
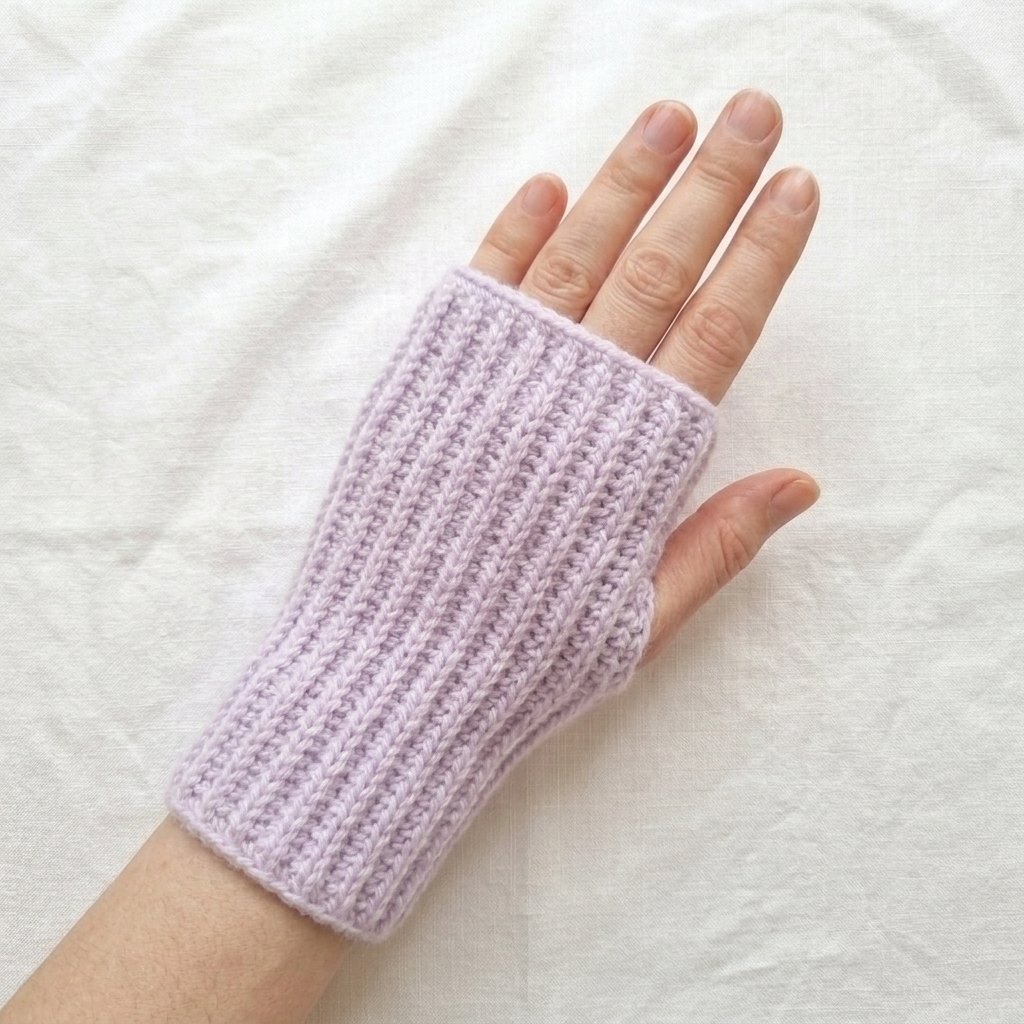
The unsewn gap will become the thumb opening.
Before finishing, try on the glove. If the opening feels too tight, undo a few stitches and make the gap slightly larger.
Tip: Do not pull the seam too tightly. A little flexibility will make the glove more comfortable.
10. Step Seven: Finish the Thumb Opening
Check the thumb opening before completing the glove.
You can leave the edge simple. Alternatively, add a single crochet border for a neater finish.
To add the border:
- Attach the lavender yarn near the opening.
- Work single crochet stitches evenly around the edge.
- Avoid adding too many stitches.
- Fasten off the yarn.
- Weave in the loose ends.
Too many stitches may cause the edge to flare. Therefore, keep the border even.
Try the glove on again. Your thumb should move comfortably without pulling the fabric.
[ADD IMAGE 11: Finished thumb opening]
Image alt text: Neatly finished thumb opening on a lavender ribbed crochet fingerless glove.
11. Step Eight: Assemble the Second Glove
Repeat the same process for the second panel.
This time, place the thumb opening on the opposite side. That way, the gloves can fit the left and right hands naturally.
Next, try on both gloves. Check the following:
- Both thumb openings feel comfortable.
- Your fingers remain uncovered.
- The wrist sections fit well.
- The seams are secure.
- Both gloves have similar measurements.
Make any necessary adjustments before weaving in the remaining yarn ends.

12. Step Nine: Finish and Care for Your Gloves
Your crochet gloves fingerless pattern is almost complete!
Follow these final steps:
- Weave in all loose yarn ends.
- Check the seams for gaps.
- Smooth the fabric gently.
- Shape both gloves so they look similar.
- Follow the yarn manufacturer’s care instructions.
Gentle hand-washing may suit some yarns. However, always check the care label first.
Avoid twisting or stretching the gloves while wet. Instead, reshape them gently and dry them according to the yarn instructions.

13. Common Mistakes and Easy Solutions
Why Is My Foundation Chain Too Tight?
Your starting chain may be too tight. Try using a more relaxed tension. Also, measure the chain before continuing.
Why Does My Ribbing Look Uneven?
Uneven tension can change the appearance of the ribs. Make sure you work into the back loop only on every ribbing row.
Why Are My Gloves Too Loose?
Your panel may be too wide. Reduce the number of rows or adjust your hook size. Then, check the fit before sewing.
How Can I Make the Thumb Opening Larger?
Unpick a few stitches along the seam. Leave a larger gap and try on the glove again.
Why Do My Gloves Look Different?
The panels may have different row counts or tension. Compare both panels before assembly to help them match.
14. Frequently Asked Questions
1. Is this crochet gloves fingerless pattern suitable for beginners?
Yes! The pattern uses a foundation chain, half double crochet, back-loop-only ribbing, and basic sewing. Beginners can practise the stitches on a small sample first.
2. What yarn is best for fingerless crochet gloves?
Soft medium-weight yarn is a good starting choice. Acrylic yarn is often easy to care for, while suitable wool blends may provide extra warmth.
3. What crochet hook size should I use?
Start with a 4.5 mm hook. However, you may need to adjust the size according to your yarn and stitch tension.
4. How much yarn do I need?
Approximately 80–100 g is a starting estimate for an average adult pair. The actual amount depends on your yarn, measurements, and tension.
5. How do I adjust the glove size?
Change the foundation chain to adjust the length. Change the number of rows to adjust the panel width. Always check the fit before assembly.
6. How do I make the thumb hole?
Fold the panel into a tube and sew the side seam. Leave a gap of about 4–5 cm for the thumb. Adjust the gap for comfort.
7. Can I make these gloves in another colour?
Absolutely! You can use cream, dusty pink, sage green, grey, or any colour you prefer. Lavender is ideal for a soft, elegant look.
8. Can I make the wrist section longer?
Yes. Adjust the panel measurements to create longer wrist coverage. Try on the glove before sewing to check the fit.
9. How long does it take to make a pair?
The time depends on your experience and crochet speed. Beginners may need several hours to complete both gloves.
10. How should I wash my crochet gloves?
Follow the yarn manufacturer’s care instructions. Gentle hand-washing may be suitable for some fibres, but other yarns require different care.
11. Can I sell gloves made using this pattern?
You can generally sell physical handmade items you make yourself, subject to applicable laws and any relevant pattern terms. If you publish or sell the written pattern, make sure your text and images are original or properly licensed.
15. Explore More Crochet Patterns
Enjoyed making these lavender fingerless gloves? You may also like these crochet projects from Crochet Home Studio.
- Try this easy crochet pencil case pattern.
- Make a thoughtful gift with this teddy bear crochet baby booties pattern.
- Add a decorative touch to your home with this autumn crochet coaster pattern.
Each project offers another way to practise crochet and create something handmade.
Conclusion
This crochet gloves fingerless pattern is a simple way to create stylish lavender gloves with a soft, ribbed texture.
First, crochet two rectangular panels. Next, fold and sew them together. Finally, leave a thumb opening and finish the edges neatly.
Remember to check your measurements as you work. Also, keep your stitch tension consistent for a comfortable fit.
Save this tutorial and enjoy making your own pair of lavender fingerless crochet gloves!