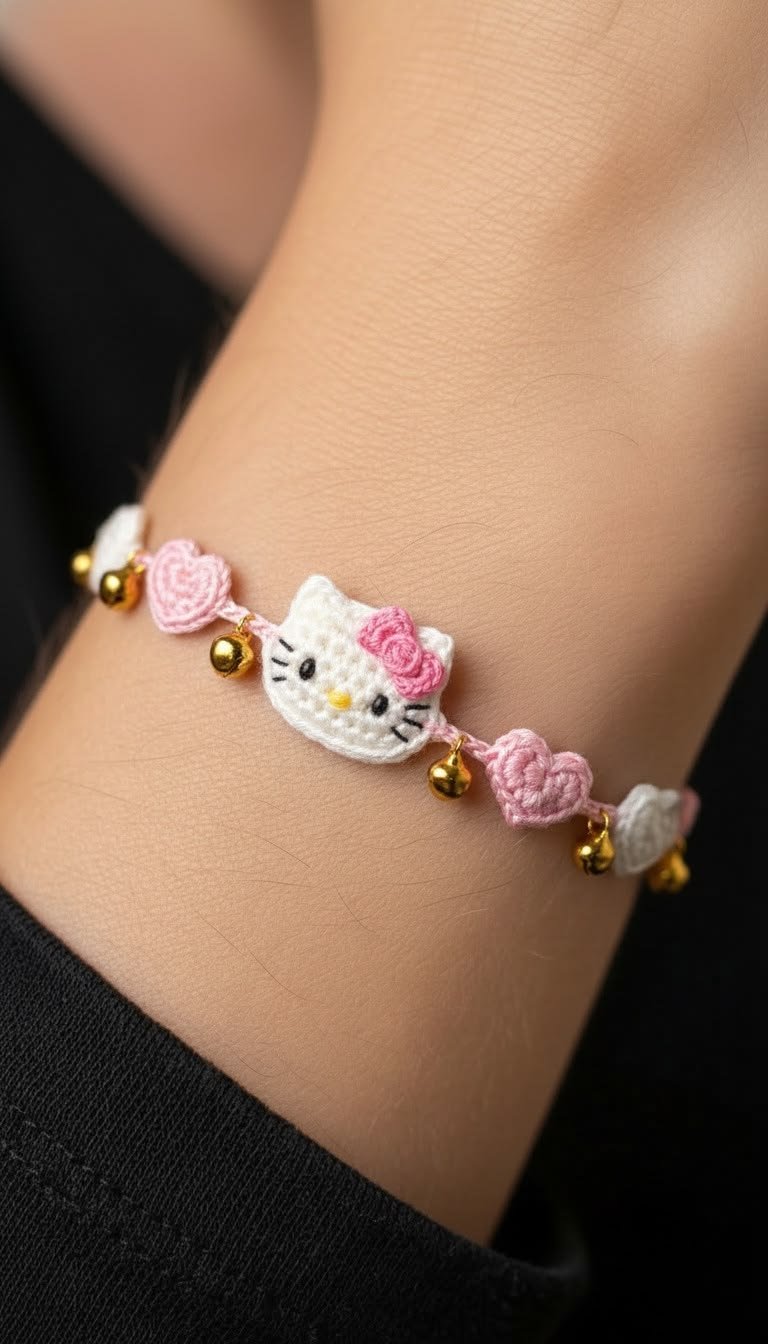
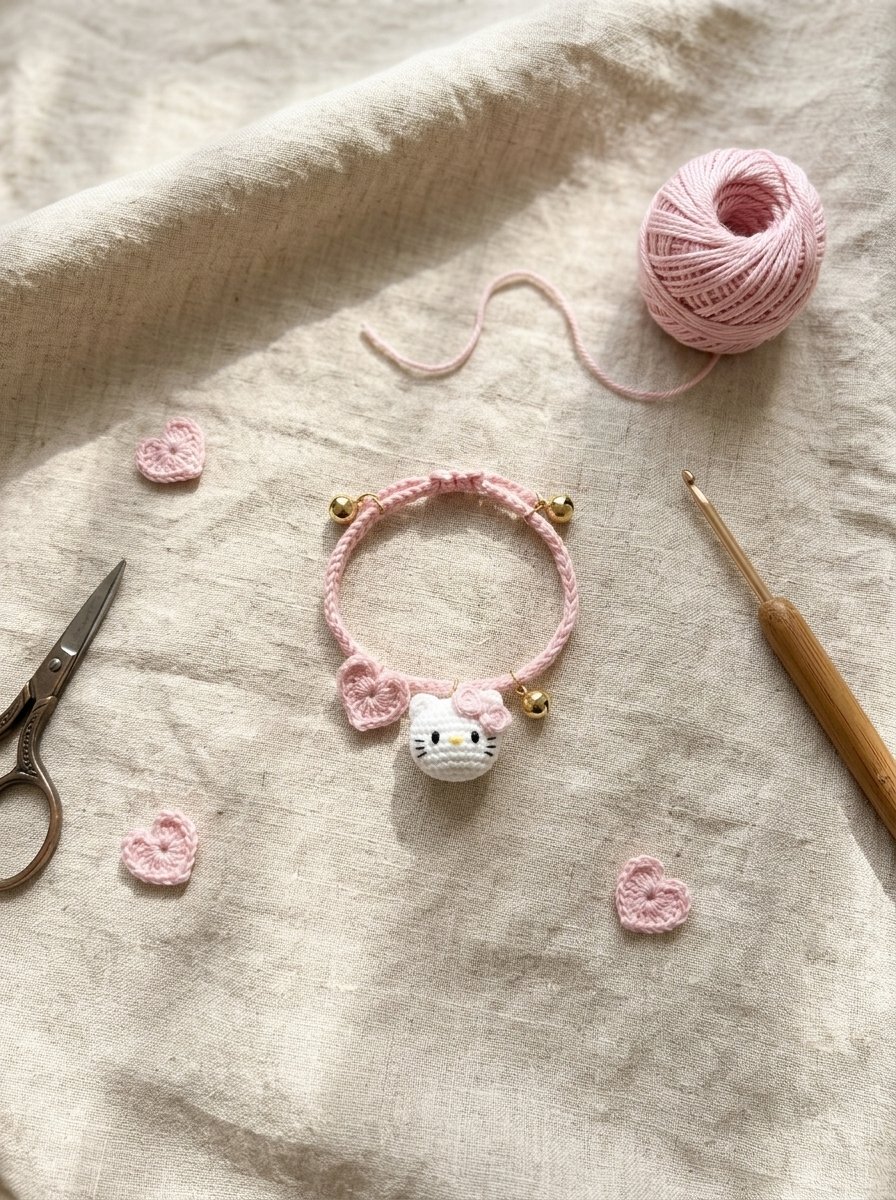
Looking for a cute and creative crochet jewelry project? This crochet Hello Kitty bracelet features a charming white cat face, a pink bow, adorable heart-shaped charms, and tiny golden bells. Its soft pink and white color combination makes it a lovely accessory for kawaii fashion lovers and anyone who enjoys handmade crochet jewelry.
Whether you want to create a special handmade gift, make matching friendship bracelets, or experiment with small crochet accessories, this design is a fun project to explore.
In this guide, you will discover the materials, basic crochet techniques, an image-inspired pattern, step-by-step instructions, and helpful tips for making your own decorative bracelet.
What Is a Crochet Hello Kitty Bracelet?
A crochet Hello Kitty bracelet is a decorative accessory inspired by the familiar white cat character, featuring a crocheted face, a bow, and colorful embellishments. The bracelet in the reference image combines a white cat face with pink crochet hearts and small gold-colored bells.
The main design elements include:
- A white crocheted cat-face charm.
- A pink bow attached near the top of the face.
- Pink heart-shaped crochet motifs.
- Small gold-colored bell charms.
- A delicate pink connecting cord.
These elements create a playful, kawaii-inspired look that pairs well with casual outfits and other cute accessories.
Note: This is an original, image-inspired crochet guide rather than a verified reproduction of the exact stitches shown in the photograph. Hello Kitty is a character owned by its respective rights holder; this fan-inspired project is not an official or affiliated product.
Materials Needed
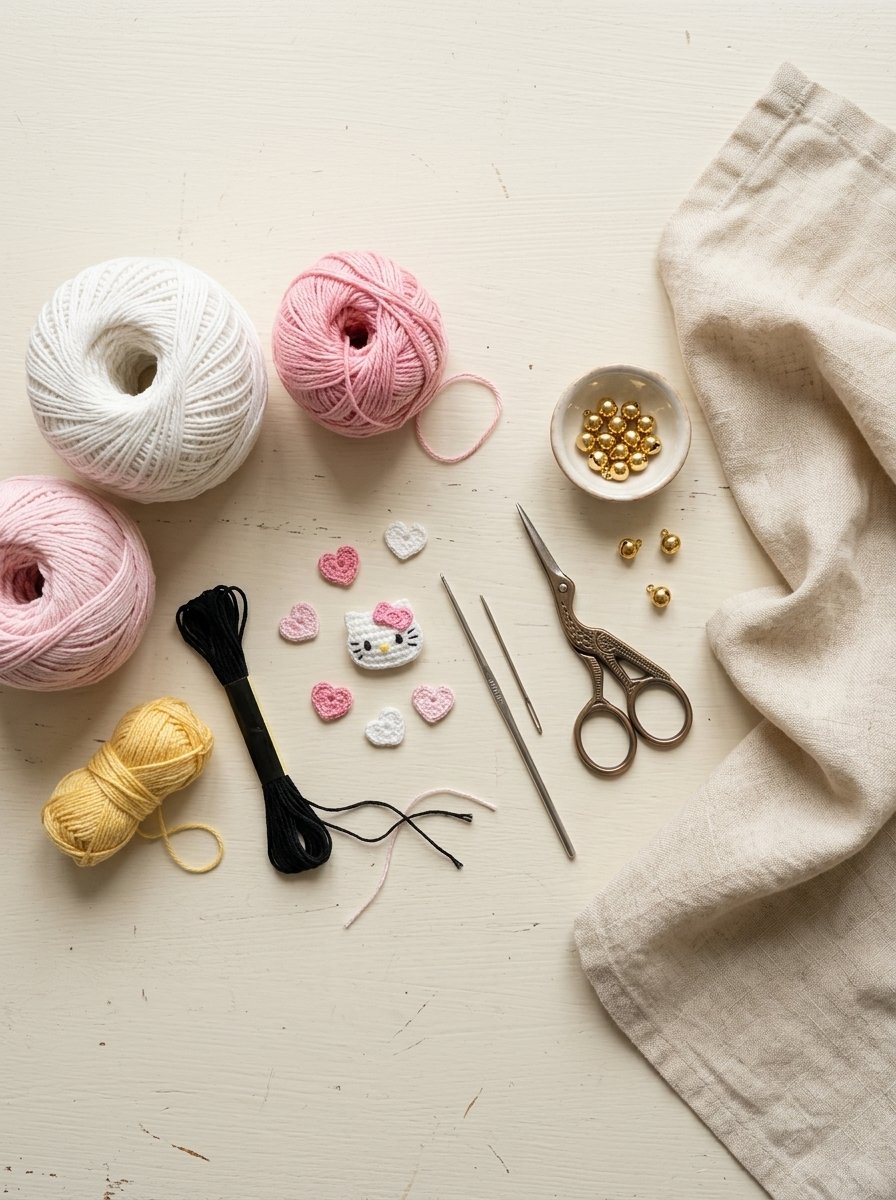
Before beginning, gather the following materials.
| Material | Suggested color | Purpose |
|---|---|---|
| Cotton yarn | White | Cat face |
| Cotton yarn | Pink | Bow and hearts |
| Cotton yarn | Light pink | Bracelet cord |
| Small amount of yarn | Yellow | Nose |
| Embroidery thread | Black | Eyes and whiskers |
| Crochet hook | 2–3 mm, depending on yarn | Small crochet motifs |
| Tapestry needle | Suitable for yarn | Sewing and finishing |
| Small bells | Gold-colored | Decorative charms |
| Bracelet clasp or adjustable cord | Optional | Bracelet closure |
| Scissors | — | Cutting yarn |
Use lightweight yarn and a small hook to create neat, compact motifs. Select securely attached, skin-safe findings and avoid small detachable parts if the bracelet will be worn by young children.
Crochet Abbreviations
The following abbreviations are used in this guide:
| Abbreviation | Meaning |
|---|---|
| ch | Chain |
| sc | Single crochet |
| hdc | Half double crochet |
| dc | Double crochet |
| sl st | Slip stitch |
| inc | Increase, working two stitches into one stitch |
| MR | Magic ring |
| st | Stitch |
How to Crochet a Hello Kitty Bracelet
Step 1: Make the White Cat Face
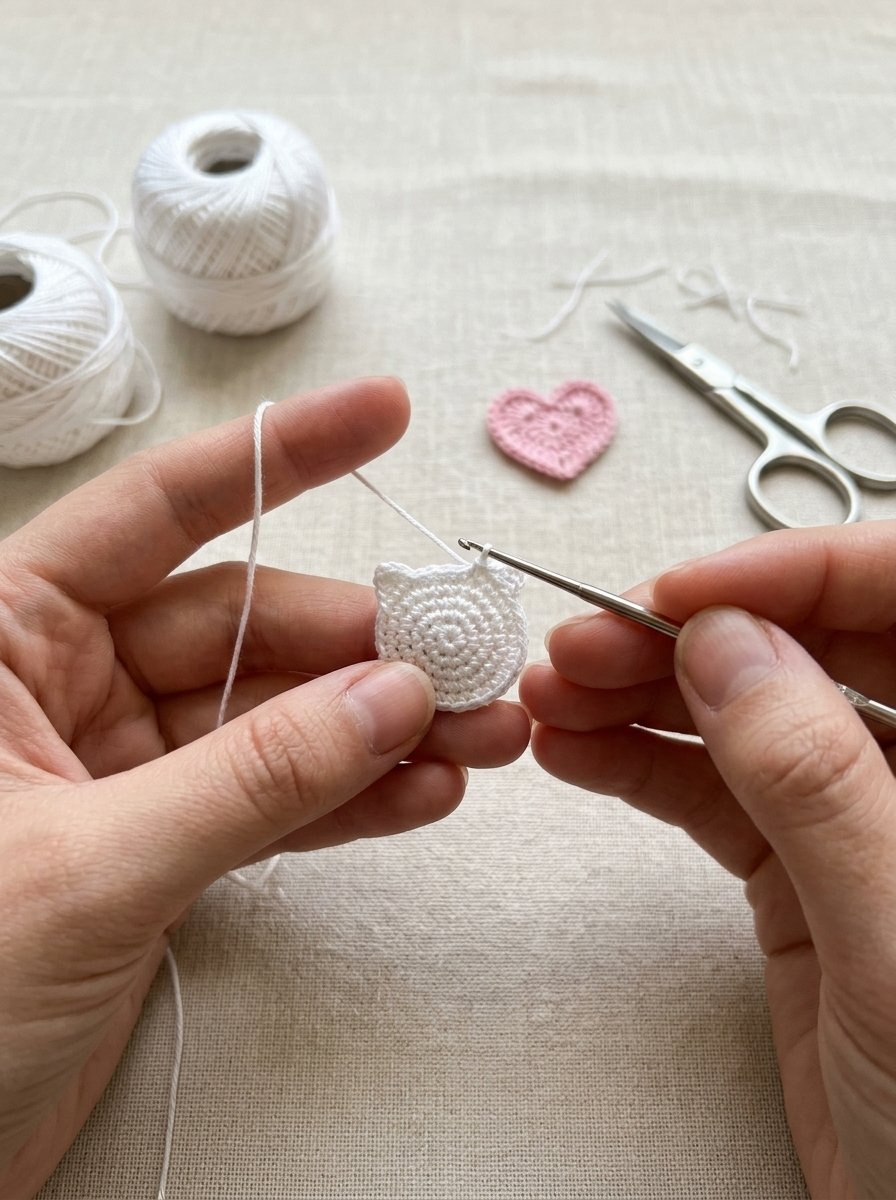
The cat face is the main focal point of the bracelet.
- With white yarn, make a magic ring.
- Work 6 sc into the ring and tighten it.
- Work 2 sc into each stitch in the next round, giving you 12 stitches.
- In the following round, repeat 1 sc in the next stitch and 2 sc in the following stitch around, giving you 18 stitches.
- Continue increasing evenly until the face reaches your desired size.
- Shape two small ears by adding short chain loops or crocheting small triangular pieces separately.
- Fasten off and weave in the yarn ends.
For a flatter face, keep the increases evenly distributed. You can crochet two matching face pieces and sew them together for a thicker charm.
Step 2: Add the Eyes, Nose, and Whiskers
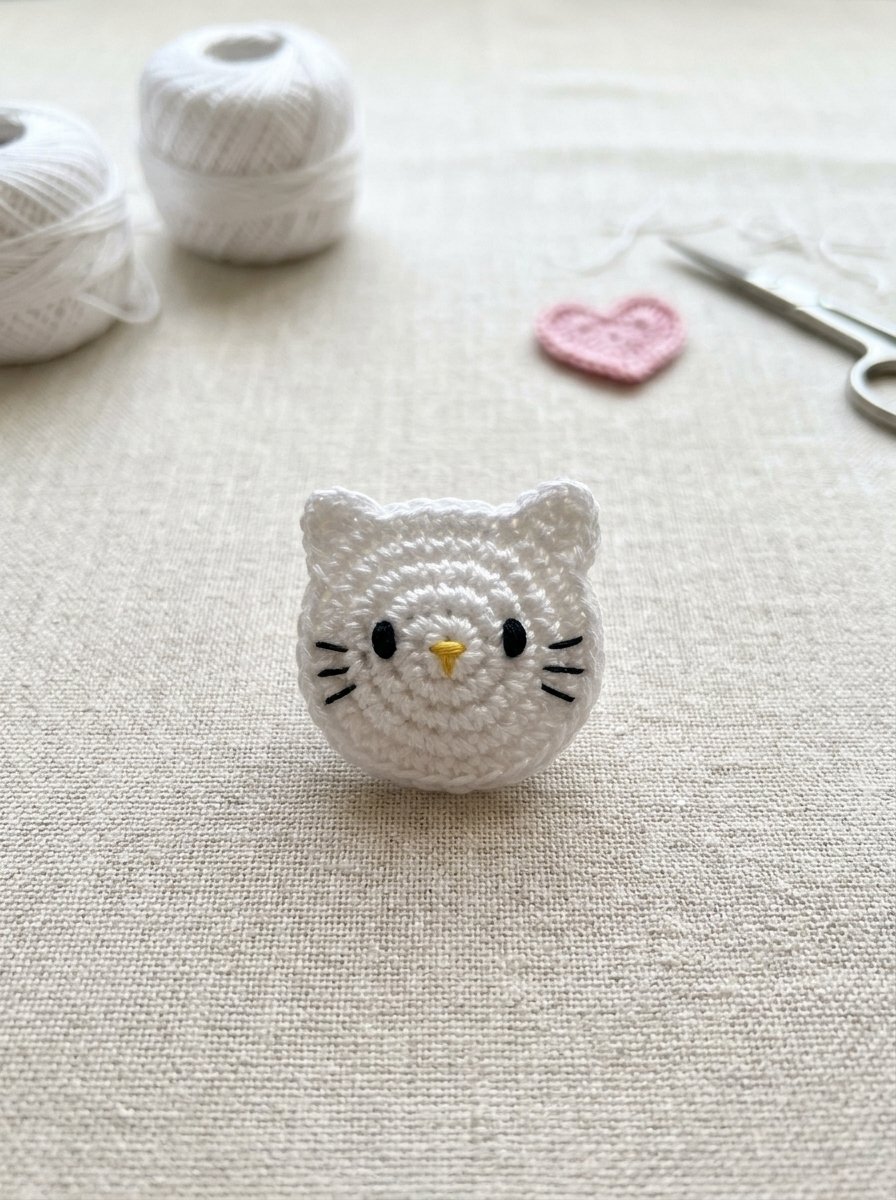
Use embroidery thread to add the facial details.
- Sew two small black oval eyes onto the white face.
- Add a tiny yellow nose between the eyes, slightly lower than their center.
- Embroider three short whisker lines on each side.
- Check that the facial features are symmetrical before securing the thread ends.
Embroidery creates a soft, neat finish without requiring plastic facial components.
Step 3: Crochet the Pink Bow
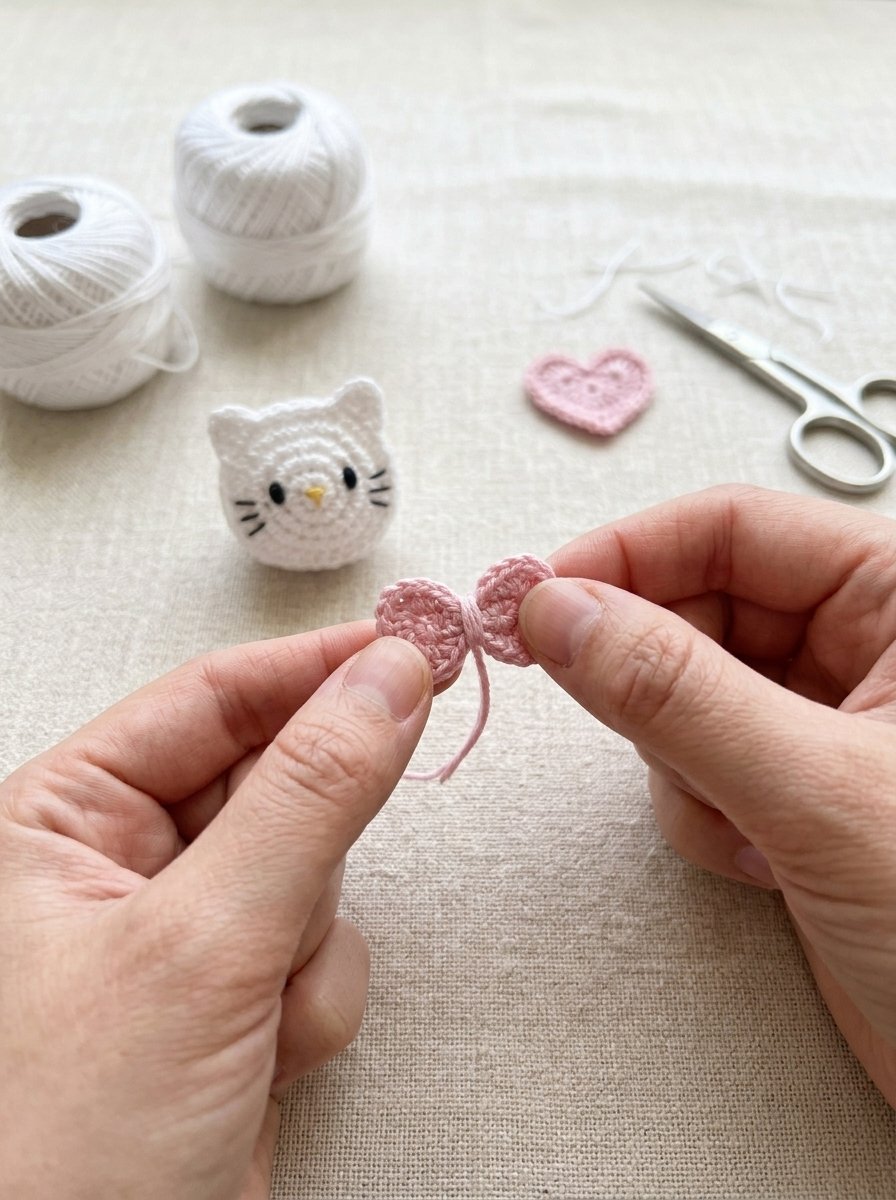
A small pink bow adds the signature decorative detail.
- With pink yarn, ch 7.
- Work 1 sc into the second chain from the hook and across the remaining chains.
- Ch 1, turn, and work another row of sc.
- Fasten off, leaving a long yarn tail.
- Wrap yarn around the center several times to form the bow shape.
- Secure the center and sew the bow onto the upper-right area of the face.
Adjust the starting chain and number of rows to make a larger or smaller bow.
Step 4: Make the Pink Crochet Hearts
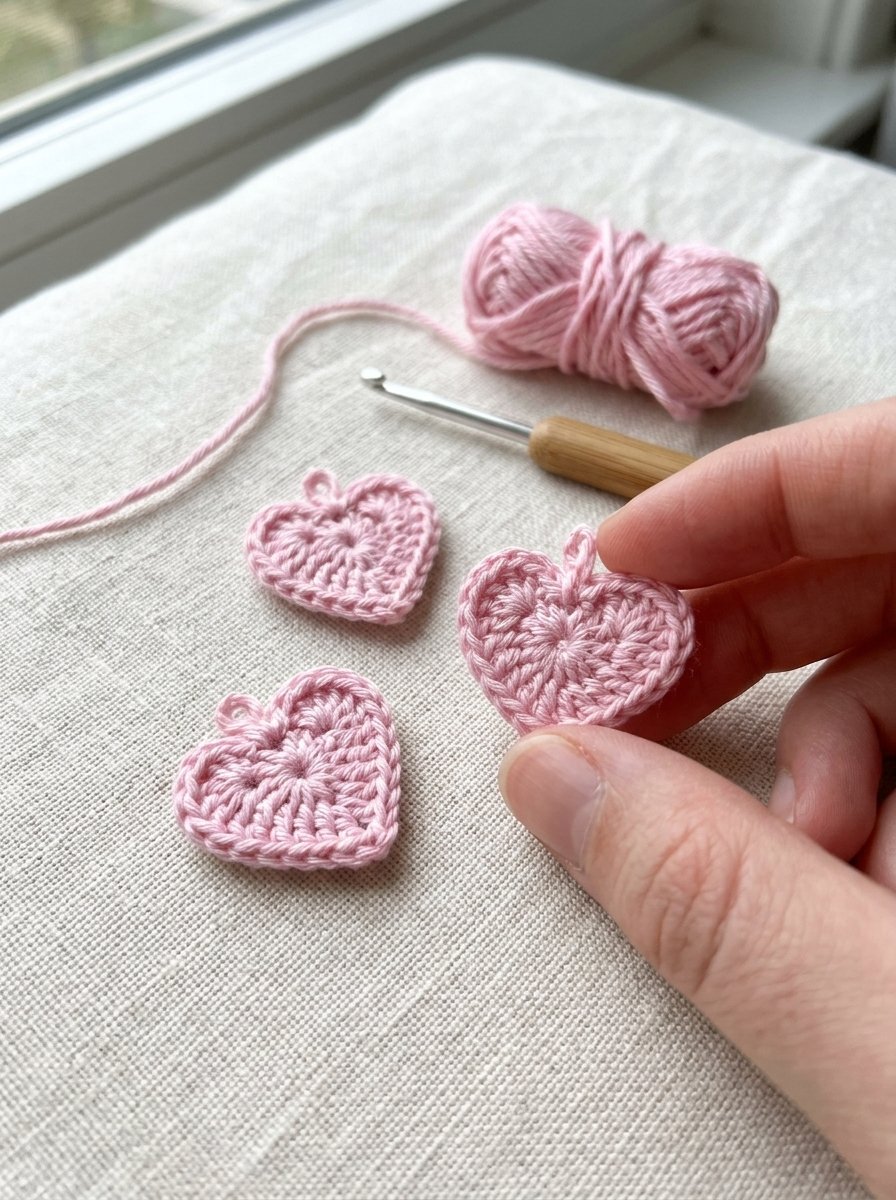
Create small heart motifs to decorate the bracelet on both sides of the cat face.
- Make a magic ring using pink yarn.
- Ch 3.
- Work 3 dc, 3 hdc, ch 1, 1 dc, ch 1, 3 hdc, and 3 dc into the ring.
- Ch 3 and join with a sl st to form the pointed bottom of the heart.
- Tighten the magic ring and arrange the stitches into a heart shape.
- Fasten off and shape the edges gently with your fingers.
This is a compact decorative heart variation. Stitch counts may need adjustment depending on your yarn and tension.
Make two or more hearts for a design similar to the reference image.
Step 5: Create the Bracelet Cord
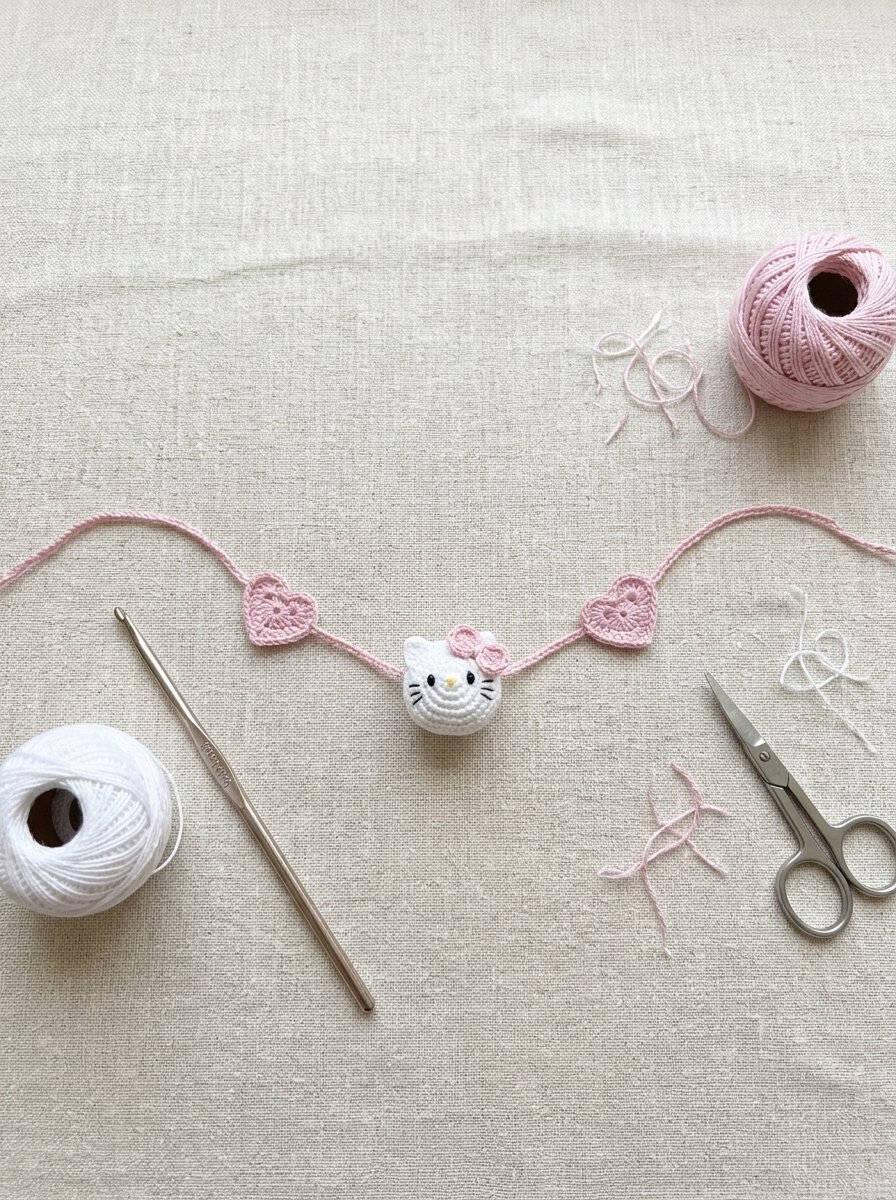
The cord connects the cat face, hearts, and decorative bells.
- With light pink yarn, make a chain long enough to fit comfortably around your wrist.
- Test the length before attaching the charms.
- For a stronger cord, work sl sts back along the chain or crochet a narrow cord.
- Attach the cat-face charm in the center.
- Position the pink hearts on either side.
- Secure each motif with several small stitches.
Leave room for an adjustable closure or a suitable bracelet clasp. The finished bracelet should fit comfortably without being too tight.
Step 6: Attach the Golden Bells
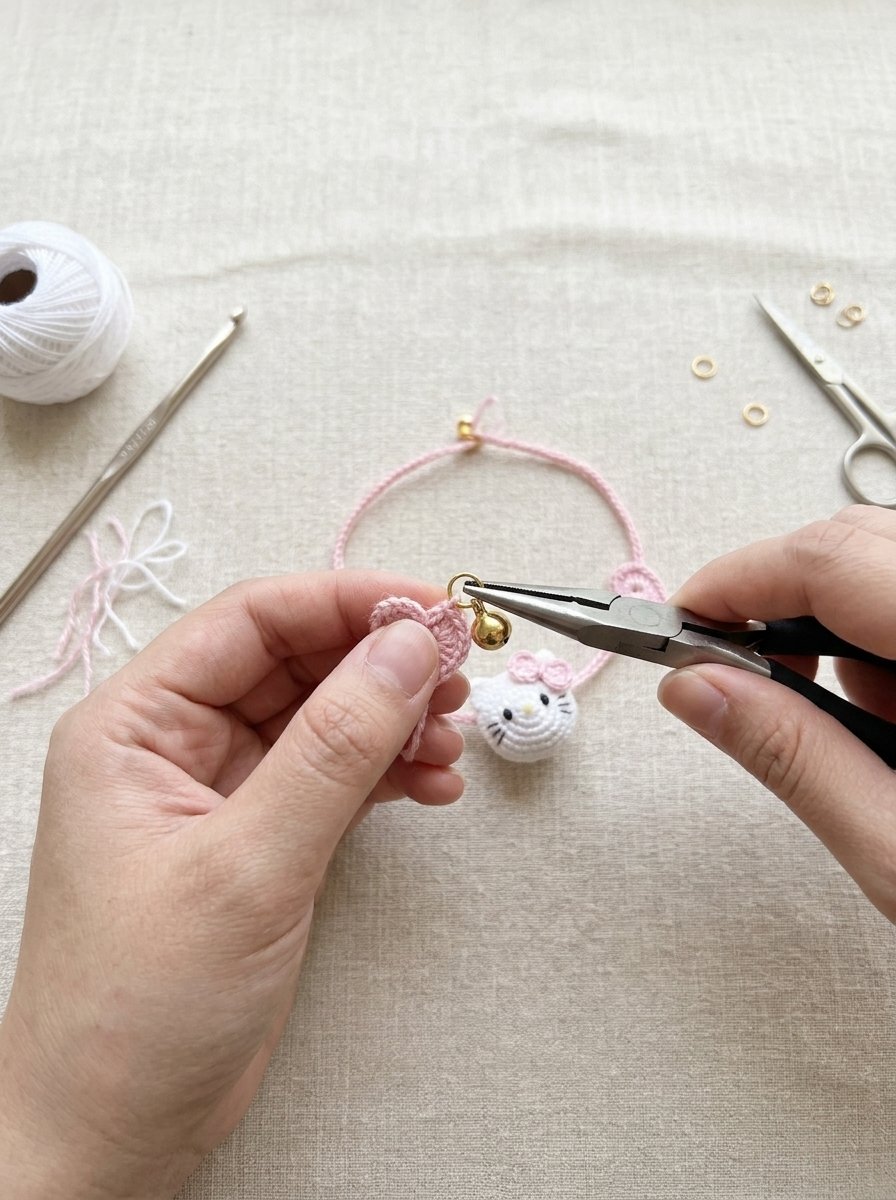
Small gold-colored bells add movement and a delicate decorative finish.
- Mark the spaces between the cat face and heart motifs.
- Attach each bell using a securely closed, skin-safe jewelry connector.
- Check that no sharp edges are exposed.
- Tug gently on each connection to ensure it is secure.
- Make sure the bracelet remains lightweight and comfortable.
If the bracelet is intended for a young child, avoid small detachable bells and other components that could present a choking hazard.
Step 7: Finish and Check the Bracelet
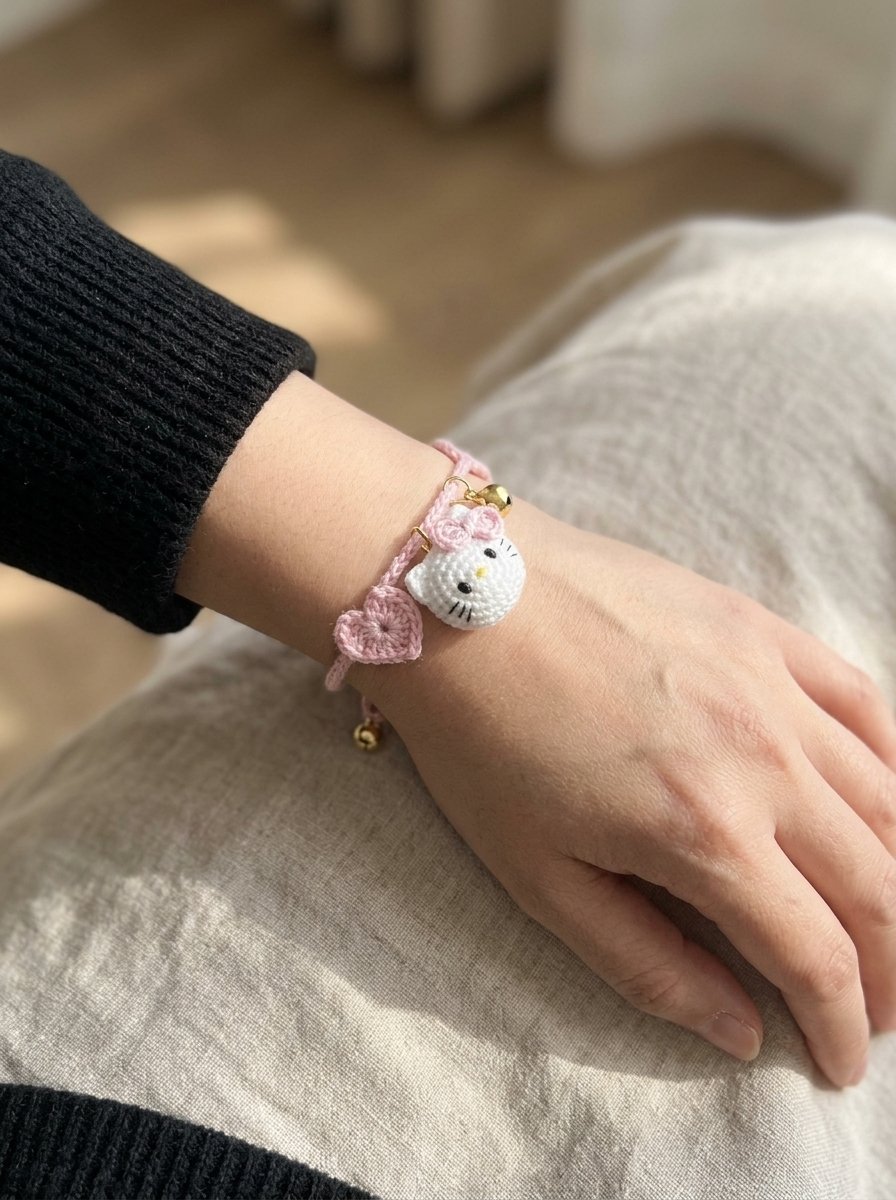
Before wearing your bracelet, inspect the complete design.
- Secure all loose yarn ends.
- Check that the bow and hearts are firmly attached.
- Ensure the embroidered facial features are neat.
- Test the clasp or adjustable closure.
- Confirm that the bells cannot easily detach.
- Try the bracelet on and check that it fits comfortably.
Your crochet bracelet is now ready to wear or give as a handmade gift.
Crochet Hello Kitty Bracelet Pattern at a Glance
| Component | Yarn color | Suggested technique |
|---|---|---|
| Cat face | White | Crochet in rounds |
| Cat ears | White | Small crochet triangles or loops |
| Eyes and whiskers | Black | Embroidery |
| Nose | Yellow | Small embroidered detail |
| Bow | Pink | Flat crochet rectangle |
| Heart charms | Pink | Crochet heart motif |
| Connecting cord | Light pink | Chain or narrow crochet cord |
| Decorative bells | Gold-colored | Secure jewelry attachments |
The quantities and stitch counts may vary according to the desired bracelet size and yarn thickness.
Tips for a Beautiful Crochet Bracelet
Choose lightweight yarn. Fine cotton yarn helps the charms remain small and flexible.
Keep the face symmetrical. Mark the center before embroidering the eyes and nose.
Use contrasting colors. White, pink, black, and yellow create a clear and recognizable design.
Secure each motif carefully. Small crochet decorations should be sewn firmly to the cord.
Test the bracelet length. Measure your wrist before adding the charms and closure.
Prioritize comfort and safety. Avoid rough edges, loose metal pieces, and detachable small decorations.
Frequently Asked Questions
1. Is this crochet Hello Kitty bracelet suitable for beginners?
Yes. The project uses basic crochet techniques, including chain stitches, single crochet, increases, and simple decorative motifs. Beginners may find the small facial details and heart shaping require some practice.
2. What yarn is best for a crochet character bracelet?
Lightweight cotton yarn is a good choice because it creates defined stitches and is generally easy to maintain. A fine cotton blend can also work well.
3. How do I make the crochet bracelet adjustable?
You can use an adjustable sliding cord, a suitable jewelry clasp, or an extension chain. Measure the finished bracelet before securing the closure.
4. Can I change the colors?
Absolutely. You can use lavender, pastel blue, red, or other colors for the bow and hearts. Choose shades that complement the white face.
5. Can I make the bracelet without bells?
Yes. The bells are optional. You can replace them with additional crochet hearts, small flowers, or simple yarn knots.
6. Is this an official Hello Kitty crochet pattern?
No. This is an image-inspired, fan-style crochet guide, not an official pattern or product endorsed by the character’s rights holder.
7. Can I sell bracelets made using this guide?
You should check the applicable character licensing and intellectual property rules before selling character-inspired products. Using a protected character commercially may require permission from the rights holder.
Final Thoughts
A crochet Hello Kitty bracelet with pink hearts is a charming way to explore handmade jewelry and small crochet accessories. The white cat face, pink bow, heart-shaped charms, and golden bells create a playful combination that can be customized to suit your style.
Gather your favorite yarn colors, take your time with the facial details, and experiment with different charms to make a unique bracelet. This project can also inspire matching keychains, bag charms, and other miniature crochet creations.